Showing posts with label java. Show all posts

Sunday, 16 February 2014

apt-get install debian PT3 (MySql)


And finally here we are, installing dbms driver on our Debian machine.

First type this line into a terminal: sudo aptitude -y install mysql-server-5.5

Right after the download of the package it will be ask to insert the mysql root password.


At this point, to test your new MySql db type in a terminal: mysql -u root -p


If you see this line, congratulation! MySql is running on your machine!

Well, now you maybe need a workbench tool to manage your databases.
Type in a terminal: sudo apt-get install mysql-workbench

After the installation, for open your workbench you just type mysql-workbench in a terminal, and you can start manage your DB.


Now, to start developing with Tomcat and Eclipse, you need the jdbc-connector.
Type in a terminal sudo apt-get install libmysql-java , and voilĂ  you have your connector ready to use.


Next time, "how put your jdbc connector on tomcat and eclipse" & "Arduino IDE".
See ya.
Ygy Freezone.


Thursday, 13 February 2014

apt-get install debian PT2 (Tomcat 7)

No post for two months and now two post in a day, sometime life if strange.
Until yesterday I cannot be able to install properly Apache Tomcat 7 service and configure it on eclipse environment. Today I've do it almost easily, just to point out the concept that life is strange. 

First of all: you need to put your user into the sudoer list by typing in a terminal the following line: sudo adduser <username> sudo

Then you must log off and again log in.
Now your user have the super user grant when you call the sudo command.

But we are here to talk about install and configure tomcat7.

You must download the tar.gz from the official website , then extract it in one directory at your choice, i choose the standard download directory in my /home/.
Then from the command line move the whole directory in the /usr/lib directory using sudo mv /path/To/apache-tomcat-7 /usr/lib

To start and stop the service now run respectively these two command in terminal: 


  • Start: sudo /usr/lib/apache-tomcat-7.0.50/bin/startup.sh
  • Stop: sudo /usr/lib/apache-tomcat-7.0.50/bin/shutdown.sh
With this method there isn't a single shell script to restart the service, you must instead manually stop and re-start with this two script or, if you are able to do it, write one script by yourself.

At this point if you type http://localhost:8080 on your browser you can see the landing page of tomcat.


Now you need to configure the admin user of the manager-pages of your server.
Open the file /usr/lib/<apache-tomcat dir>/conf/tomcat-users.xml and inside the tag <tomcat-user> put the following line:


<role rolename="manager-gui"/>
<user username="<your user>" password="<your password>" roles="manager-gui,admin-gui"/>

Stop and restart the service, and access the manager app after typing your credential when needed.


From here you can easily deploy your project without using the file manager other than manage session and project.

Configuring Tomcat as server of Eclipse:

You have just install Tomcat in the way that I described above. Now you want to use it on eclipse, right?
Nothing most simple: 
You must go to Windows->preferences->server->Runtime Environment and add your Tomcat server.
Once you have add the server you can try a simple JSP page to test it.

If you do it, remember to stop the tomcat from a terminal window, or eclipse do not take it well and cry like a little girl.


Arrived here you probably ask why I don't install Tomcat from repository.
The answer is simple: apt-get install tomcat7 allows you to use the useful commands service tomcat7 start/restart/stop but divide the tomcat directory in a lot of places, so eclipse can retrieve some of the file that he need to use the server. 
There is a lot of tutorial for fix this problem, but to me no one seems working.


In the next post I'll explain how to install and configure MySql dbms.
Ygy Freezone


Wednesday, 12 February 2014

apt-get install debian PT1 (Java jdk & Eclipse)


It's been a long time since my last post, more than two months, I apologize but in this months I change company and I do not have so much time to develop my personal project, I swear ASAP I'll restart my Arduino guide.

In my personal "dev machine" until last sunday I have a development environment based on win-xp, and because, as you can probably know, Microsoft cut every support to it in the nexts month I decided to migrating my dev-laptop on linux, and after some advice from some of my linux-enthusiast friends I choose the Debian distribution.

Is important to know that I am a Win power user, and I don't know almost nothing about Linux and his terminal based management, in fact I come from an environment completely different from it, and because I think this is a good challenge for me and useful for someone else I decided to post this worklog about the installation and configuration of my good-old dev-laptop.


This is what I want on my machine:


The Installation of the new OS:

Coming from a win environment, I don't have really clear in my mind what problem can have a open source system. One of this problem is the lack of open source firmware for some of the hardware in my laptop.
For my specific case the missing firmware was for the wifi antenna and for the Ati Radeon.

To retrieve this firmware and driver after the full basic installation, you need first to modify the repository list in /etc/apt/sources.list

To do this, you must first find the repository that you need.
I use the repository list built from http://debgen.simplylinux.ch/ 

After the update of the repository list, I open a terminal (I do it as root, since my user isn't in the sudoer list and sudo command do not work. I'll add my user in the sudoer in the near future, because I do not feel good to be root every time I use apt-get) and type aptitude.


Aptitude is a package manager, and I find it very useful. 

Using some simply shortkeys you can find everything you want inside the repository.


Aptitude shortkeys:
u -> update list
U (shift + u) -> mark upgradable
/ -> find name packet (n -> next result, shift + n -> previous result)
+ -> install this packet
- -> remove this packet
g -> install/remove


After the installation of the missing firmware/driver, you can choose to change GUI of my Debian, for example KDE.
KDE is not the default gui of debian, so you must install it.
From the terminal type: sudo apt-get install kde-full


I choose to maintain the Gnome GUI style, which is the default gui of debian.


Now you have your system ready, all firmware and driver installed and the gui reflect what you want.
It's time to satisfy your first developer needs (no its neither porn nor coffee).

The Installation of the Java Jdk and Eclipse IDE:


As you can read in the Debian wiki, Debian provides several Java implementations. Each of them have a development environment (JDK) and a runtime (known as JRE, or Java Virtual Machines JVM).

Open the terminal and type sudo aptitude  then search ("/") "?provides(java-runtime)" on your system to list available packages.
I choose to install the latest OpenJDK which is based on the java 7, instead of the default jdk proposed by Debian which is based on java 6.

To install Eclipse, since on the repository i found only old and deprecated version, I choose to download directly from the website the Eclipse IDE for Java EE Developers.

Doing this, exactly like in win, you only need to extract the tar.gz file into a directory and run eclipse.
You can also configure your system in a way he can run eclipse from terminal or from the main menu ad you can see here.
Honestly, the procedure to make possible run eclipse from terminal do not work for me, it give me some error either on root or normal user. I'll study the causes in the future.
Instead the method to create a new menu item is work fine.


Yesterday I tried also to download and install tomcat, with not much success.

So next time: Installing Tomcat 7 and configuring it, associate tomcat to Eclipse and configure it.
Ygy Frezoone.


Tuesday, 26 November 2013

Internet of Things and the world of tomorrow


No matter where you are, everyone is always connected


The introduction line above here, is an aphorism from an old (1998) anime called Serial Experiment Lain, in this anime everything and everyone are always connected to the net and the story plot run both on the physical and the virtual world. This anime was broadcast 15 year ago, one year before Matrix, but some year after the cyberpunk revolution of the 80's. 
All of these things are pioneer of the idea of the Internet of Things (IoT) which is the current technological trends for the coming years: from the 80's we imagine a world full connected to the net, physical and virtual world connected into a new way of existence.
But what is this IoT things? IoT , according to the wikipedia definition, is a concept born in the 1999 from the mind of Kevin Ashton and refers to the virtual representation of some real object and their connection on the net. Using some tag, like RFID/NFC chip or even a simple qr-code, the object can be referred to it's virtual entity. 
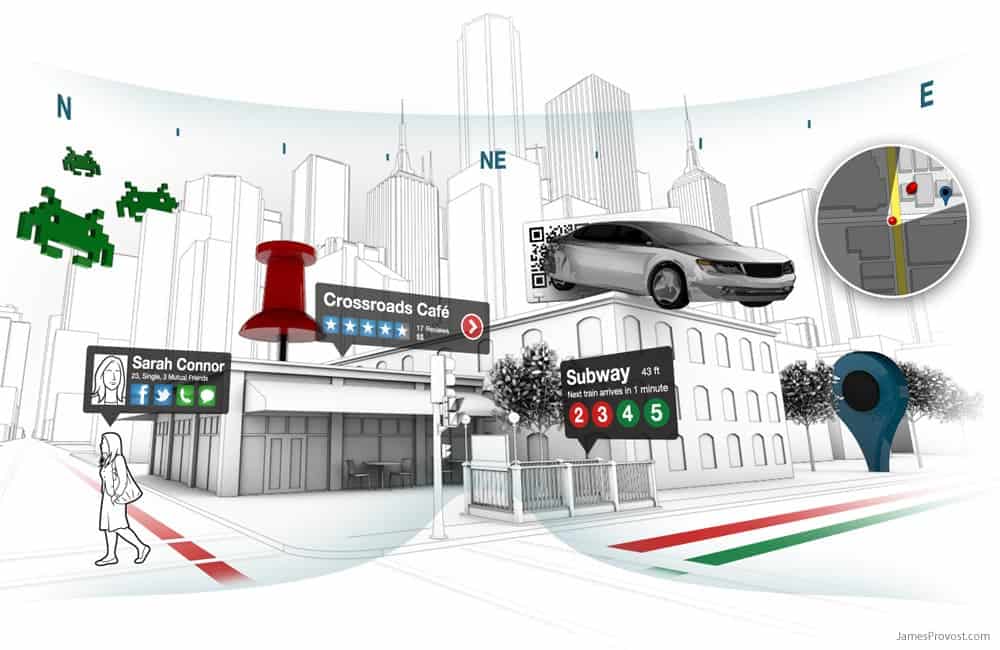
Imagine: you go into a shop in your preferred mall and see some dress you like, with your AR-glasses watch and select the object and put it into a virtual shopping cart. 
Then you move near the mirror, put your phone (which is connected with your glasses) into the right place on the mirror and your cart will appear on the mirror glass, then you can choose something there is in your cart and virtual try on yourself.


Then when your are done you simply put your phone on the register, doing this you just do the self checkout, empty your cart and print the bill, when required you pay all what you buy simply putting your phone on the contact less card reader. After paying  your order, go out from the shop, and see the street of the mall, on your lenses appear all the information needed from every shop...


... On the metro on the way back home, you check the temp in your house and set ON the heating system, during the trip you remember that you want to cook some chicken tonight, so you turn ON the oven from your smartphone. Meanwhile your cleaning robot send you an notification that he has done his work, and while wait for new task he go to the recharger point...


For some of you these situation seems like something from an Sci-Fi movie, but in fact this is more near to us than you can expect: nfc payment from your phone is already real in some country (like USA and UK for example), the Google Glasses are near to the official release (the rumors say that they release the G-Glass during the 2014) and other similar device are in the home straight, there is some app for our smartphone which give a real Augmented Reality experience and domotic is already a reality in some nation.
Cisco System expect that before the 2020 there will be more than 30 billion device connected to the internet, not only smartphone or tablet or computer, but everything can have it's virtual counterpart, and at that moment the IoT change is name to Internet of Everything. We will be surrounded by computer and connection, the virtual world will be inseparable from the physical world and vice versa.

I read and hear lot of speeches, from the internet and from my CEO, and when I hear one of them reduce this digital revolution to one single stage make me sad. 
There is no way to separate electronic engineering from software engineering at this point, if you want to be remembered as innovator you can't simply follow the flow doing some app for a smartphone. You must create your system and your app must be integrated in your system.
When I proposed to do some workshop on the microcontroller platform for electrical prototyping, like Arduino, to the technical leader of my company, who has always been enthusiastic in this IoT stuff, he answered me "but why do we need this?". He simply do not get the point of these time, he simply follow the flow. This is not planning the work for the next year, this is a try to stay afloat against all the competitor.
If you want to be in the revolution you must be the leader of the revolution: In or Out, there is no half term.

We as software developers, designers, analysts, as electronic and telecommunications engineer for the first time in history, really have the future in our hand. We can shape the future, in the way we want.
We can finally create the Future that we are ever dream, but we are ready to shape it?

Ygy Freezone

Wednesday, 6 November 2013

Java Application for tracking monthly income and balance pt3


Ok, ok I said I'd post the next chapter of the Arduino Starter Kit, but I can't leave this project in half with horrible layout and various fix to do, so here we are.

I fix the layout, improve the readability and add the message box when closing.
For fixing the layout I choose to separate the components into 3 JPanel, adding all three into a GroupLayout set as layoutmanager of the JFrame

The first and the third JPanel are themeselves managed with a GroupLayout, otherwise the second JPanel has a simple FlowLayout because in it there is only the JTable.

The graphical result is the screen down here:


The only fix I need now is to align the third JPanel to center, or move the JCheckBox and the save JButton near the extreme left, aligned with the left edge of the JTable.


To add the message in the closing action when have unsaved modification, I inherit the WindowListener and in his windowClosing() method I managed the Exit. For doing this you must set the default closing action of the JFrame to DO_NOTHING_ON_CLOSE , and change when it need.
I don't have really implemented the others methods because I don't need them in this project. But I must put their implementation in my code or there is a compiler error caused by the not fully implementation of the methods present in the WindowListener interface.

If you want to see the full code is still on my GitHub repository . Now, as you can see up here, I need to align the JPanel3 to center, and change the JLabel jlabError with a JOptionPane message, and maybe improve readability and shortening the code, but these are minor improvement so next evening I can work on next chapter of Arduino for real.

Ygy Freezone

Monday, 4 November 2013

Java Application for tracking monthly income and balance pt2


New week, new post. I'm almost done with my little application described in the last post , I need to do only the pop up message when closing and I need to do some fixes to the layout, as you can see in the screen below.


You can find the full code at my repository on GitHub, and here is the part of code which make me mad:

I'll try to use multiple pane, and so multiple layout manager, to resolve this damn layout, as explained here. When I fix I post everything.

Tomorrow, I swear, Arduino! Ygy Freezone

Thursday, 31 October 2013

Java Application for tracking monthly income and balance


As I say in the very first post, I use this blog as worklog for my personal project, and since with my Arduino Starter Kit explanation I'm blocked (I don't have a 9V battery, and neither the time to go out and buy it, shame on me), I'm now working on a little project that I have in mind from long time.

For tracking my personal bank balance, inasmuch as I found the movement list in my home banking not useful, I usually use an Excel file that do simple calculation and return how much money I can spent over the month. So why not write this in java using Swing?

So here a simple analysis:
Monthly Income (shortened in MonIn), is a simple java application which read a file with some hashtag inside, each tag define a value.
Using Swing GUI, display this data to video, then let you modify the data and calculate some total predetermined.

In the future I change the file I/O with a DataBase and relative query.


As you can see I'm a real artist when using MSPaint. 

The source file contains some tag in this form:
#tag1 = value1;
#tag2= value2;
...
#tagN=valueN;
The java.io package is needed to read and write to the file.

The Swing GUI contains the form with all the text field, a table, a button to make the calculation, a checkbox to enable advance setting.

in the future I change the form adding a tabbed pane


The first four text fields are JTextFields, tfAccrual is not editable (setEnabled(false)) and by default set to 200. Constant loss is a JTable, and contains only standard monthly expenses. By default is not editable.
CalcBtn is a JButton, which at click calc the total. Advanced Setting is a JCheckBox, if selected enable editing to tfAccrual and Constant Loss. Totals are three JTextField, not editable, when start application they contains the previous month total.
SaveBtn is a JButton, when pressed write the new value to the file (or in the DB).
This project use the GroupLayout as Layout Manager.
JFrame cannot be resizable in this application (setResizable(false));

On exit, using a WindowListener to check the exit before the closing action of the frame, if there are no unsaved modification then exit, else popup a message that ask if want to save before exit, the popup message is a JOptionPane.

On line documentation about these component and listener on Oracle Doc and Oracle Tutorial.
JTable: Oracle Doc  Oracle Tutorial
GroupLayout: Oracle Tutorial
JFrame: Oracle Doc
WindowListener: Oracle Tutorial
JOptionPane: Oracle Doc
Swing Tutorial: The GuideBook

I the next days I'll post, alternating with Arduino, all the code and some image of this project.
Ygy Freezone