Even without read the full report, from the graph we can see some interesting differences between the Hype Cycle of the last year and from the one of this year:
In example the fast growth of the IoT from IT (innovation trigger) to the PIE (peak of inflated expectation) , or even the fast fall down of the Big Data from the PIE to the TD (trough of disillusionment). Is interesting also the growth from TD to the SE (slope of enlightenment) of technologies like 3D Printing and Virtual Reality, or the entry of the cryptocurrencies.
In my point of view something is too high and something else is too low in the graph, but substantially I agree with the researchers in the global view of what is the technologies future and the path to follow to monetize the progress of one or other of this technologies.
What do you think about this trending graph? Are you agree with Gartner?
Is PC, and therefore Microsoft, dead with no chance to be great again as every pseudo-expert over the internet (and not only) said in the last years?
Absolutely not, and not only in some single specialized market, but in every major market in our global IT ecosystem.
For let you understand my POV: First: in the earliest months of 2014 there were a lot of studies that declare that PC is anything but dead, with much more profits and market share respect to console or to other computer platform (MacOs/Linux/Other). (I.E.: As Global PC Game Revenue Surpasses Consoles-Forbes , but it's only one of a long list, from both economist and gaming perspective).
Thenthis study from Gartner, which show us that Microsoft have not only an higher market share respect Apple, but will have also a bigger growth in the next years.
Pc and Microsoft are more alive then ever, and we can be sure they will be a major competitor in every IT challenge in the next years.
It is the Nadella's cure effect or it was the totally wrong previsions made in the past from some wannabe-famous author?
What do you think, Is PC( and Microsoft) dead?
Let me know in the comment.
PS: It's a long time since my last pure-techical post, and even more from my last Arduino post. I hope to begin to post again that stuff soon ;)
This post maybe can be a little off topic on this dev-blog, but "Hey! it's my blog!" so fuck off, I'll talk about alpaca if I want...
After this little preface we can start to talk about Ubisoft upcoming game Watch Dogs.
Some day ago Ubisoft release on Steam the prerelease purchase options of Watch Dogs, and then also the all-want-system-requirements, and on this topic the gaming community start the nth flame about this game.
Because if the minimum req are accessible to almost all gamers, the recommended leave the community with their mouth open.
Recommended System Requirements:
OS: Windows Vista (SP2), Windows 7 (SP1) or Windows 8 (Please note that we only support 64 bit OSs.)
Graphics: DirectX 11 graphics card with 2 GB Video RAM - Nvidia Geforce GTX 560 ti or AMD Radeon HD 7850
DirectX: Version 11
Hard Drive: 25 GB available space
Sound Card: DirectX 9.0c Compatible Sound Card with Latest Drivers
Additional Notes: Broadband connection and service required for multiplayer mode. Supported Video Cards at Time of Release: nVidia GeForce GTX460 or better, GT500, GT600, GT700 series; AMD Radeon HD5850 or better, HD6000, HD7000, R7 and R9 series Intel® Iris™ Pro HD 5200
If Graphics and memory requirements are the standard in this days, the community ask to herself why this game need to run properly an Intel Core i7-3770 or an AMD equivalent, pointing, as fact instead opinion, that the modern games are all powered by GPU and the processor do not do much work.
So let start talk about "How games are designed".
I'm not a game developer, but as software developer, engineer, and last but not least, gamer, I know, or at least I imagine, how this work: The GPU and the video card do not calculate the algorithm needed by the AIs , the gpu simply elaborate the calculation needed for graphics, and all the powerful cards listed above are needed only for elaborate the HD texture of an "enormous" city, or at least a big part of it since the dev claim to don't love the load time present in many game so they reduce it to the minimum possible so, as you can imagine, if you want a fluid and smooth visual with synchronous rendering without texture-lag of an entire living city you need a massive card.
In WD they also claim to recreate a living city, with thousand of NPC, every of them will have his personal dialogue scripts, story and background, so every single NPC will run a separate AI.
The AI will not run on a thread on your powerful Nvidia Titan Black/AMD HD Radeon R290, the AI instead create a thread on your processor. This things is clearly visible in other game like Assetto Corsa, by the Italian Kunos Simulazioni, which is in a sort of beta since they choose the pre-release method to sell their game, in this game when you race against the max number of opponents, the game engine put the CPU usage up to 95% suddenly and often crashes as you can see in these topics on the steamcommunity forum here and here.
This happen with less than 30 AIs which all run concurrently on your processor, now imagine what can happen if instead of 30 there are more than 100 AIs + lot of cameras + who-know-what ?
If your system is not powerful enough or the game is not properly optimised IT BURN YOUR FUCKING COMPUTER.
Yeah this image is a bit strong, but in my experience I can tell you that is not so far from reality.
With my I7 2600 in the summer of 2011, which was a REALLY HOT summer, with stock Intel cooler the temp on the processor hit the 90°C and shutdown. After that I buy a bigger dual fan tower air CPU-cooler, and after that I don't have any problem.
So, little crying guys, instead of arguing on the fact which in your opinion your Intel Quad Core from 2006 is still enough for playing games since for you it's all a GPU work, buying a new system and start talking about which cooler is better to prevent your system to burn you, your house and your neighbourhood.
With the hope that you paid for a proper cooling system, I salute you.
Ygy Freezone.
Here we are, today as you probably know we'll talk about installing JDBC connector for MySql/Tomcat/Eclipse and the Arduino IDE (in the top picture you can see my abnormal ability to modify images in paint).
JDBC connector:
First of all: you need to install it. To do so you tipe in a terminal: sudo apt-get install libmysql-java
This will extract the connector jar into the /usr/share/java/ directory
For install the JDBC driver into Eclipse you'll need to make it visible to Eclipse in some way.
Some guide tell you to put the jar into the Java Build Path libraries of your project. But, probably for some conflict between the CLASSPATH environment variables, in my case this does not work. Maybe it work in a non web project, but in my case with dynamic web project with tomcat as web-server it not. So I put the jar into the lib dir of the apache tomcat's installation dir. Doing this and run your project both on Eclipse or in the browser, the jar will be retrieved from the lib dir of tomcat instead to be retrieved from the build path. If in the future I set the build path properly I'll either modify this post or do one new post. Arduino IDE: As you can see in the official website, the Arduino IDE has been packaged. So to install it you only need to type sudo apt-get install arduino into a terminal and voilà, your Arduino IDE is ready to be used. You need only to type arduino in a terminal and it will be asked to insert your user to the dialout group. Click Add and then type the password.
After you has been inserted into the dialout group you can finally use your Arduino IDE:
At this point I don't need anything else on my new dev-machine. If I find any other problem and relative solution I'll do another post. See ya. Ygy Freezone
No post for two months and now two post in a day, sometime life if strange. Until yesterday I cannot be able to install properly Apache Tomcat 7 service and configure it on eclipse environment. Today I've do it almost easily, just to point out the concept that life is strange.
First of all: you need to put your user into the sudoer list by typing in a terminal the following line: sudo adduser <username> sudo Then you must log off and again log in. Now your user have the super user grant when you call the sudo command.
But we are here to talk about install and configure tomcat7. You must download the tar.gz from the official website , then extract it in one directory at your choice, i choose the standard download directory in my /home/. Then from the command line move the whole directory in the /usr/lib directory using sudo mv /path/To/apache-tomcat-7 /usr/lib
To start and stop the service now run respectively these two command in terminal:
With this method there isn't a single shell script to restart the service, you must instead manually stop and re-start with this two script or, if you are able to do it, write one script by yourself.
At this point if you type http://localhost:8080 on your browser you can see the landing page of tomcat.
Now you need to configure the admin user of the manager-pages of your server.
Open the file /usr/lib/<apache-tomcat dir>/conf/tomcat-users.xml and inside the tag <tomcat-user> put the following line:
Stop and restart the service, and access the manager app after typing your credential when needed.
From here you can easily deploy your project without using the file manager other than manage session and project.
Configuring Tomcat as server of Eclipse:
You have just install Tomcat in the way that I described above. Now you want to use it on eclipse, right?
Nothing most simple:
You must go to Windows->preferences->server->Runtime Environment and add your Tomcat server.
Once you have add the server you can try a simple JSP page to test it.
If you do it, remember to stop the tomcat from a terminal window, or eclipse do not take it well and cry like a little girl.
Arrived here you probably ask why I don't install Tomcat from repository.
The answer is simple: apt-get install tomcat7 allows you to use the useful commands service tomcat7 start/restart/stop but divide the tomcat directory in a lot of places, so eclipse can retrieve some of the file that he need to use the server.
There is a lot of tutorial for fix this problem, but to me no one seems working.
In the next post I'll explain how to install and configure MySql dbms.
It's been a long time since my last post, more than two months, I apologize but in this months I change company and I do not have so much time to develop my personal project, I swear ASAP I'll restart my Arduino guide. In my personal "dev machine" until last sunday I have a development environment based on win-xp, and because, as you can probably know, Microsoft cut every support to it in the nexts month I decided to migrating my dev-laptop on linux, and after some advice from some of my linux-enthusiast friends I choose the Debian distribution.
Is important to know that I am a Win power user, and I don't know almost nothing about Linux and his terminal based management, in fact I come from an environment completely different from it, and because I think this is a good challenge for me and useful for someone else I decided to post this worklog about the installation and configuration of my good-old dev-laptop.
This is what I want on my machine:
The Installation of the new OS: Coming from a win environment, I don't have really clear in my mind what problem can have a open source system. One of this problem is the lack of open source firmware for some of the hardware in my laptop. For my specific case the missing firmware was for the wifi antenna and for the Ati Radeon.
To retrieve this firmware and driver after the full basic installation, you need first to modify the repository list in /etc/apt/sources.list To do this, you must first find the repository that you need. I use the repository list built from http://debgen.simplylinux.ch/ After the update of the repository list, I open a terminal (I do it as root, since my user isn't in the sudoer list and sudo command do not work. I'll add my user in the sudoer in the near future, because I do not feel good to be root every time I use apt-get) and type aptitude.
Aptitude is a package manager, and I find it very useful. Using some simply shortkeys you can find everything you want inside the repository.
Aptitude shortkeys:
u -> update list
U (shift + u) -> mark upgradable
/ -> find name packet (n -> next result, shift + n -> previous result)
+ -> install this packet
- -> remove this packet
g -> install/remove
After the installation of the missing firmware/driver, you can choose to change GUI of my Debian, for example KDE. KDE is not the default gui of debian, so you must install it. From the terminal type: sudo apt-get install kde-full
I choose to maintain the Gnome GUI style, which is the default gui of debian.
Now you have your system ready, all firmware and driver installed and the gui reflect what you want. It's time to satisfy your first developer needs (no its neither porn nor coffee). The Installation of the Java Jdk and Eclipse IDE:
As you can read in the Debian wiki, Debian provides several Java implementations. Each of them have a development environment (JDK) and a runtime (known as JRE, or Java Virtual Machines JVM). Open the terminal and type sudo aptitude then search ("/") "?provides(java-runtime)" on your system to list available packages. I choose to install the latest OpenJDK which is based on the java 7, instead of the default jdk proposed by Debian which is based on java 6.
To install Eclipse, since on the repository i found only old and deprecated version, I choose to download directly from the website the Eclipse IDE for Java EE Developers. Doing this, exactly like in win, you only need to extract the tar.gz file into a directory and run eclipse. You can also configure your system in a way he can run eclipse from terminal or from the main menu ad you can see here. Honestly, the procedure to make possible run eclipse from terminal do not work for me, it give me some error either on root or normal user. I'll study the causes in the future. Instead the method to create a new menu item is work fine.
Yesterday I tried also to download and install tomcat, with not much success. So next time: Installing Tomcat 7 and configuring it, associate tomcat to Eclipse and configure it. Ygy Frezoone.
11 CRYSTAL BALL a mystical tour to answer all your tough question
12 KNOCK LOCK tap out the secret code to open the door
Chapter 11:
In this project we'll use an LCD screen, that can be used to display alphanumeric characters.
In the code section they explain how to use the switch case statement and the random() function.
The switch() statement execute different code depending on the value you give it in input.
Each of these code is called case.
Syntax:
switch (controllVariable){
case 1:
//..
case 2:
//..
case N:
//...
}
The random() function returns a number based on the argument you provide it.
I really wanted to do some modification to this project, or also create some project by myself with the lcd screen, but this time the problem is pretty physical: as you can see in the opening pic the breadboard is pretty full, and sadly I do not own a bigger one. When I can afford to buy some more pieces I post an update.
Chapter 12:
In this chapter we'll going to use the piezo as input: When plugged into 5V, the piezo can detect vibration, that can be read by the Arduino's analog input.
In the code section this time they introduce how to declare you own function. When you declare your own function you must indicate if it going to return value or not, in the first case you must indicate the type (int, long, float, etc...) otherwise you indicate the type as void, I.E. like you see in the basic function setup() and loop().
Next you indicate the name of the function and after that, inside round bracket, indicate the argument of the function.
Syntax:
[type/void] functionName (argtype arg) {
//..
}
Here a video demonstration of this project:
Next time I'll post all the three remaining chapter, and then I finally concluded the Starter Kit and so I can finally try something that run on my mind from some time.
No matter where you are, everyone is always connected
The introduction line above here, is an aphorism from an old (1998) anime called Serial Experiment Lain, in this anime everything and everyone are always connected to the net and the story plot run both on the physical and the virtual world. This anime was broadcast 15 year ago, one year before Matrix, but some year after the cyberpunk revolution of the 80's.
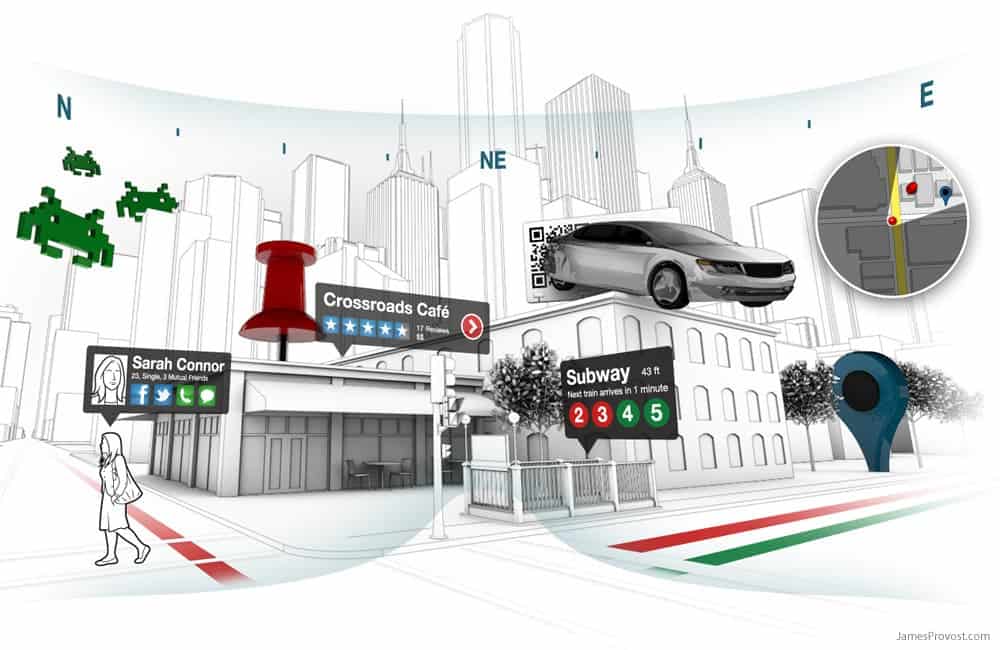
All of these things are pioneer of the idea of the Internet of Things (IoT) which is the current technological trends for the coming years: from the 80's we imagine a world full connected to the net, physical and virtual world connected into a new way of existence.
But what is this IoT things? IoT , according to the wikipedia definition, is a concept born in the 1999 from the mind of Kevin Ashton and refers to the virtual representation of some real object and their connection on the net. Using some tag, like RFID/NFC chip or even a simple qr-code, the object can be referred to it's virtual entity.
Imagine: you go into a shop in your preferred mall and see some dress you like, with your AR-glasses watch and select the object and put it into a virtual shopping cart.
Then you move near the mirror, put your phone (which is connected with your glasses) into the right place on the mirror and your cart will appear on the mirror glass, then you can choose something there is in your cart and virtual try on yourself.
Then when your are done you simply put your phone on the register, doing this you just do the self checkout, empty your cart and print the bill, when required you pay all what you buy simply putting your phone on the contact less card reader. After paying your order, go out from the shop, and see the street of the mall, on your lenses appear all the information needed from every shop...
... On the metro on the way back home, you check the temp in your house and set ON the heating system, during the trip you remember that you want to cook some chicken tonight, so you turn ON the oven from your smartphone. Meanwhile your cleaning robot send you an notification that he has done his work, and while wait for new task he go to the recharger point...
For some of you these situation seems like something from an Sci-Fi movie, but in fact this is more near to us than you can expect: nfc payment from your phone is already real in some country (like USA and UK for example), the Google Glasses are near to the official release (the rumors say that they release the G-Glass during the 2014) and other similar device are in the home straight, there is some app for our smartphone which give a real Augmented Reality experience and domotic is already a reality in some nation.
Cisco System expect that before the 2020 there will be more than 30 billion device connected to the internet, not only smartphone or tablet or computer, but everything can have it's virtual counterpart, and at that moment the IoT change is name to Internet of Everything. We will be surrounded by computer and connection, the virtual world will be inseparable from the physical world and vice versa.
I read and hear lot of speeches, from the internet and from my CEO, and when I hear one of them reduce this digital revolution to one single stage make me sad.
There is no way to separate electronic engineering from software engineering at this point, if you want to be remembered as innovator you can't simply follow the flow doing some app for a smartphone. You must create your system and your app must be integrated in your system.
When I proposed to do some workshop on the microcontroller platform for electrical prototyping, like Arduino, to the technical leader of my company, who has always been enthusiastic in this IoT stuff, he answered me "but why do we need this?". He simply do not get the point of these time, he simply follow the flow. This is not planning the work for the next year, this is a try to stay afloat against all the competitor.
If you want to be in the revolution you must be the leader of the revolution: In or Out, there is no half term.
We as software developers, designers, analysts, as electronic and telecommunications engineer for the first time in history, really have the future in our hand. We can shape the future, in the way we want.
We can finally create the Future that we are ever dream, but we are ready to shape it?
It's been a long time since my last post, I'm sorry I've be very busy in these weeks.
Trying to restart the Arduino Starter Kit explanation, today I'll explain what you can find in the chapter 9 and 10 of the manual.
09 MOTORIZED PINWHEEL a color wheel that will have your head spinning
10 ZOETROPE create a mechanical animation you can play forward or reverse
Both of this chapter do not add anything new to the code side, in fact both project are pretty similar to the code used for turning on a led.
Chapter 09:
In this chapter we'll use a motor, a mosfet and a diode.
Motors typically require more current than the Arduino can provide. The Arduino can only provide 40mA from it's digital pins, much less than required to a motor to work.
So we'll use an external 9v battery.
A mosfet is a transistor, and they are components that allow you to controll high current or voltage power sources from the current output of the Arduino. A transistor is in fact a digital switch: when you provide voltage to the gate pin it close the circuit between the other two pins (source and drain).
A motor is a type of inductive device. Induction is a process by which a changing electrical current in a wire can generate a changing magnetic field around the wire. When a motor is given electricity a tightly wound coil create a magnetic field which cause the shaft to spin around.
To protect the transistor from the back-voltage generated from the inertia of the motor you should put a diode in parallel with the motor. The diode allow electricity to flow in one direction protecting the rest of the circuit.
Chapter 10:
Based on the previous chapter, here you use an H-Bridge to reverse the polarity of the motor.
An H-Bridge is a type of component know as Integrated Circuit that has a lot of transistor built in.
Since there is no new code to explain in both chapter for today is over, hope to post the next chapter a little earlier than the last time.
Ok, ok I said I'd post the next chapter of the Arduino Starter Kit, but I can't leave this project in half with horrible layout and various fix to do, so here we are.
I fix the layout, improve the readability and add the message box when closing.
For fixing the layout I choose to separate the components into 3 JPanel, adding all three into a GroupLayout set as layoutmanager of the JFrame
The first and the third JPanel are themeselves managed with a GroupLayout, otherwise the second JPanel has a simple FlowLayout because in it there is only the JTable.
The graphical result is the screen down here:
The only fix I need now is to align the third JPanel to center, or move the JCheckBox and the save JButton near the extreme left, aligned with the left edge of the JTable.
To add the message in the closing action when have unsaved modification, I inherit the WindowListener and in his windowClosing() method I managed the Exit. For doing this you must set the default closing action of the JFrame to DO_NOTHING_ON_CLOSE , and change when it need.
I don't have really implemented the others methods because I don't need them in this project. But I must put their implementation in my code or there is a compiler error caused by the not fully implementation of the methods present in the WindowListener interface.
If you want to see the full code is still on my GitHub repository . Now, as you can see up here, I need to align the JPanel3 to center, and change the JLabel jlabError with a JOptionPane message, and maybe improve readability and shortening the code, but these are minor improvement so next evening I can work on next chapter of Arduino for real.
New week, new post. I'm almost done with my little application described in the last post , I need to do only the pop up message when closing and I need to do some fixes to the layout, as you can see in the screen below.
You can find the full code at my repository on GitHub, and here is the part of code which make me mad:
I'll try to use multiple pane, and so multiple layout manager, to resolve this damn layout, as explained here.
When I fix I post everything.
As I say in the very first post, I use this blog as worklog for my personal project, and since with my Arduino Starter Kit explanation I'm blocked (I don't have a 9V battery, and neither the time to go out and buy it, shame on me), I'm now working on a little project that I have in mind from long time.
For tracking my personal bank balance, inasmuch as I found the movement list in my home banking not useful, I usually use an Excel file that do simple calculation and return how much money I can spent over the month. So why not write this in java using Swing?
So here a simple analysis:
Monthly Income (shortened in MonIn), is a simple java application which read a file with some hashtag inside, each tag define a value.
Using Swing GUI, display this data to video, then let you modify the data and calculate some total predetermined.
In the future I change the file I/O with a DataBase and relative query.
As you can see I'm a real artist when using MSPaint.
The source file contains some tag in this form:
#tag1 = value1;
#tag2= value2;
...
#tagN=valueN;
The java.io package is needed to read and write to the file.
The Swing GUI contains the form with all the text field, a table, a button to make the calculation, a checkbox to enable advance setting.
in the future I change the form adding a tabbed pane
The first four text fields are JTextFields, tfAccrual is not editable (setEnabled(false)) and by default set to 200. Constant loss is a JTable, and contains only standard monthly expenses. By default is not editable.
CalcBtn is a JButton, which at click calc the total. Advanced Setting is a JCheckBox, if selected enable editing to tfAccrual and Constant Loss. Totals are three JTextField, not editable, when start application they contains the previous month total.
SaveBtn is a JButton, when pressed write the new value to the file (or in the DB).
This project use the GroupLayout as Layout Manager.
JFrame cannot be resizable in this application (setResizable(false));
On exit, using a WindowListener to check the exit before the closing action of the frame, if there are no unsaved modification then exit, else popup a message that ask if want to save before exit, the popup message is a JOptionPane.
As you can see, is a lot that I don't post anything so I choose to post 2 chapter. I choose to do this because these projects took more time to built than to explain it.
In this post I'll explain the following chapter of the manual:
07 KEYBOARD INSTRUMENT play music and make some noise with this keyboard
08 DIGITAL HOURGLASS a light-up hourglass that can stop you from working too much
Chapter 07:
In this chapter they introduce the concept of Resistor Ladder.
A Resistor Ladder is an electrical circuit made of repeating unit of resistor, this time we built a R2R Ladder which is a simple way to perform a Digital to Analog conversion (wikipedia docet).
In the top photo you can see the circuit build on the board,
and here the Resistor ladder with the switch in parallel.
In the code section in this chapter they introduce the concept of array. An Array is a way to store different values that are related to each other using only one name.
Like in many other languages, the declaration and the initialisation of an array is made up with the following syntax:
where arrayType is the type which you want associate to the array (primitive type or an object for example), arrayName is the name, and n is the indexing notation, which represent the max index value you can store in the array. In the second declaration don't require the index notation, but you simply put all the needed value between curly braces and divide each one with a comma.
For retrieve a value inside the array you must call the value using his index inside the array
Syntax:
varType var = arrayName[index];
remember which the index of the array, when you retrieve the value, start from 0 (zero), so if your maximum index value is 5, in fact the last index is 4 because the first is 0.
In this chapter they present also the noTone() function, which is used to stop any sound from the piezo.
Syntax:
void noTone(pin)
where pin is the pin of the board with a piezo connected to it.
Here a very poor video of the operation of our keyboard:
Chapter 08:
In this chapter there is only two new things: the Tilt Sensor and the Long data type.
The tilt sensor is a sensor with a small metal ball inside itself, and when you move it, he change his state.
Is like an Accelerometer, but less expensive and give less information (only up/down), in fact the Accelerometer is a tilt sensor it self.
The circuit:
In the code section they introduce another data type.
The millis() function, as explained in the previous chapter, keeps track of the time your arduino has been running in milliseconds. So far you've been using only int data type, and an integer is a 16-bit number and it holds value between -32,768 and 32,768. To holds the return value of millis() in a safe manner you must use long data type. The long data type holds a 32-bit number, thus between -2,147,483,648 and 2,147,483,648 and in his unsigned version holds number between 0 and 4,294,967,295.
Using millis() for more than 32 seconds, as you can see by your self, you need to use a long variable to hold its value.
Here the circuit build and ready to count time.
I change the time in which the led turn on, because in the original code check if every led is on after 600000 millisecond, so every 10 minute a led turn on. Since I don't want to wait 1 hour to see the operation of our hourglass, I change this variable to 60000 which is only one minute,and a led turn on every 10 second.
Here a video of the operation of this little project:
And, after the video, here a gif of this little project:
In the next chapters we will use a 9V battery for use a motor. Cool things, no?
Ygy Freezone